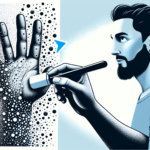
Image sharpening is a crucial aspect of photo editing that can significantly enhance the details and clarity of your photographs. Whether you are a professional photographer or a hobbyist, mastering the techniques of image sharpening can elevate the quality of your photos. This article will explore various methods and tips for effectively sharpening images.
Understanding Image Sharpening
Image sharpening involves enhancing the contrast at the edges within a photo, which gives the perception of greater definition and crispness. While sharpening cannot create details that do not exist, it can make the image appear more detailed and focused.
The Importance of Sharpening
Sharpening is vital for various reasons:
- Enhancement of Details: Sharpening brings out the fine details, making textures and features more distinguishable.
- Printing Quality: High-resolution printing requires images to be sharp to ensure the final output is clear and defined.
- Correction of Blurriness: For slightly blurred photos, sharpening can help compensate for the lack of focus.
Basic Techniques of Image Sharpening
1. Unsharp Mask (USM)
The Unsharp Mask is a classic and commonly used sharpening tool available in many photo-editing software packages like Adobe Photoshop and GIMP. Despite its confusing name, it sharpens rather than blurs the image.
- Amount: Determines the strength of the sharpening effect.
- Radius: Defines the width of the edges to be enhanced.
- Threshold: Controls which pixels are affected based on tonal differences.
2. High Pass Filter
The High Pass Filter method is another popular technique used for image sharpening. It works by isolating the fine details in an image and applying sharpening selectively.
Steps:
- Duplicate the original image layer.
- Apply the High Pass Filter to the duplicate layer.
- Set the blend mode of the duplicate layer to “Overlay” or “Soft Light.”
3. Smart Sharpen
Adobe Photoshop’s Smart Sharpen tool provides more advanced control over sharpening. It allows you to reduce noise and adjust the amount of sharpening applied to shadows and highlights separately.
Key options include:
- Amount: Controls the sharpening intensity.
- Radius: Adjusts the size of the edges to be sharpened.
- Reduce Noise: Helps minimize noise while sharpening.
4. Clarity Adjustment
Clarity adjustment works differently from traditional sharpening methods. It enhances the local contrast of an image, making it look clearer and sharper without enhancing noise.
Steps:
- Open the image in a photo-editing program, such as Adobe Lightroom.
- Locate the Clarity slider and adjust it to enhance mid-tone contrasts.
Advanced Image Sharpening Techniques
1. Deconvolution Sharpening
Deconvolution sharpening uses complex algorithms to reverse the blurring process that occurs during image capture. This technique can produce outstanding results but is computationally intensive.
Software such as Topaz Sharpen AI and Adobe Photoshop can perform deconvolution sharpening. The technique involves capturing a blur kernel and applying a mathematical model to reverse the blur.
2. Frequency Separation
Frequency Separation is an advanced technique that separates an image into high-frequency and low-frequency layers. The high-frequency layer contains details and textures, whereas the low-frequency layer includes colors and tones.
Steps:
- Duplicate the original image layer twice.
- Apply a Gaussian Blur to the lower duplicate layer.
- Subtract the blurred image from the upper duplicate layer using the Apply Image option.
- Set the blend mode of the upper layer to Linear Light.
Tips for Effective Image Sharpening
1. Avoid Over-Sharpening
Over-sharpening can introduce unwanted artifacts, such as halos and noise, degrading the image quality. Always compare the sharpened image with the original to ensure that the sharpening appears natural.
2. Use Layer Masks
Applying sharpening selectively can prevent unwanted effects in certain areas of an image. Use layer masks to apply sharpening only to specific parts that require enhancement, leaving other parts untouched.
3. Consider Output Medium
The optimal sharpening settings can vary depending on the intended display medium. Different sharpening amounts may be required for web display versus large prints. Adjust your sharpening technique based on where and how the image will be viewed.
4. Combine Techniques
Sometimes, combining different sharpening techniques can yield the best results. For instance, using a subtle Unsharp Mask followed by Clarity adjustments can enhance detail without introducing noise.
Conclusion
Image sharpening is a powerful tool that can significantly enhance the visual appeal of your photographs. By mastering the various sharpening techniques and applying them thoughtfully, you can achieve professional-quality results. Remember to avoid over-sharpening, use selective sharpening methods, and tailor your approach based on the intended output medium. With practice and experimentation, you will become proficient in the art of image sharpening, taking your photo editing skills to the next level.
FAQs
1. What is the best sharpening technique for beginners?
Answer: The Unsharp Mask (USM) is a good starting point for beginners due to its simplicity and effectiveness. It is widely available in various photo-editing software, and its settings are easy to understand and adjust.
2. Can sharpening fix a blurry photo?
Answer: Sharpening can help improve the appearance of a slightly blurry photo by enhancing edge contrasts. However, it cannot fully restore a severely blurred image. For significant blur, advanced techniques like deconvolution may offer better results.
3. How can I avoid introducing noise while sharpening?
Answer: To minimize noise, use tools like Adobe Photoshop’s Smart Sharpen, which includes a Reduce Noise option. Additionally, applying sharpening selectively using layer masks can help prevent noise in smooth areas.
4. Is it necessary to sharpen images for web display?
Answer: Yes, sharpening images for web display is important to ensure they appear crisp and detailed on various devices. However, be cautious not to over-sharpen, as it can lead to artifacts and an unnatural look.
5. What is the difference between clarity adjustment and traditional sharpening?
Answer: Clarity adjustment enhances mid-tone contrasts, which can make the image look sharper and clearer without directly increasing edge contrast. Traditional sharpening methods like Unsharp Mask focus on enhancing high-frequency edge details.


