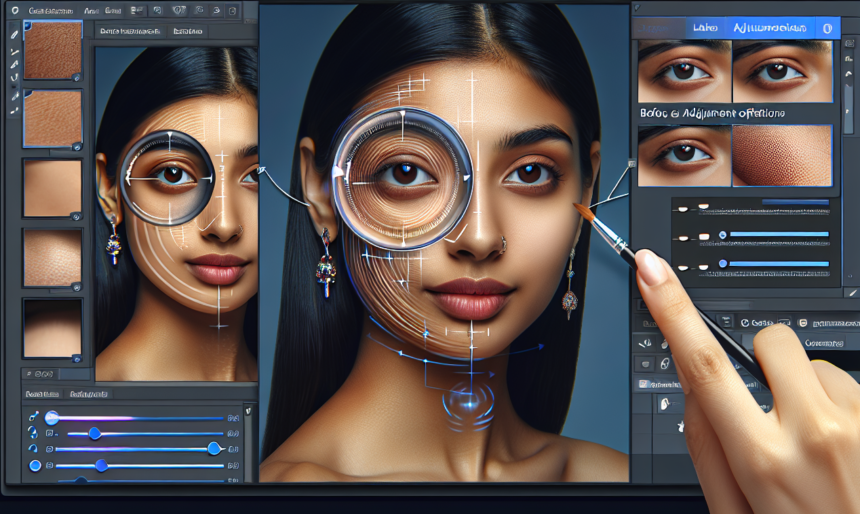
In the realm of digital photography, impeccable skin retouching is a sought-after skill. Photoshop offers an array of powerful tools to enhance the skin while preserving its natural texture. This article delves into advanced techniques for achieving flawless skin retouching, ensuring that portraits look professional without appearing artificial.
Dodge and Burn
Dodge and Burn is a time-tested technique used by photographers to manipulate light and shadow. This method involves selectively lightening or darkening areas of the skin to create depth and highlight features without compromising texture.
- Create two new layers above your image. Rename one layer “Dodge” and the other “Burn.”
- Set both layers to Overlay blending mode, and fill them with 50% gray.
- Select a soft white brush with low opacity (about 10-20%) and paint on the “Dodge” layer to lighten areas such as the forehead, cheekbones, nose bridge, and chin.
- Switch to a black brush for the “Burn” layer and darken areas like the sides of the nose, under the cheekbones, and jawline.
This subtle adjustment helps in accentuating the natural contour of the face, adding dimension and realism to the portrait.
Frequency Separation
Frequency Separation is a sophisticated technique that separates the texture and color of the skin into two different layers. This method allows for precise retouching without damaging the skin’s natural texture.
- Duplicate the original image layer twice.
- Name the first duplicated layer “Low Frequency” and the second “High Frequency.”
- Apply a Gaussian Blur to the “Low Frequency” layer to remove fine details. The radius depends on the resolution but typically ranges between 5-10 pixels.
- On the “High Frequency” layer, apply the High Pass filter with the same radius used for the Gaussian Blur.
- Set the “High Frequency” layer to Linear Light blending mode.
Now, you can work on the “Low Frequency” layer to smooth out color inconsistencies with the Healing Brush or Clone Stamp. Use the “High Frequency” layer to retain skin texture while removing minor blemishes.
Inverted High Pass for Skin Smoothing
The Inverted High Pass technique is excellent for smoothing skin while preserving details. This process involves inverting the High Pass filter to enhance blending and create a polished look.
- Duplicate the original layer and apply a High Pass filter (Filter > Other > High Pass).
- Set the radius to capture fine skin textures, usually around 2-5 pixels.
- Invert the High Pass layer (Ctrl+I or Command+I on a Mac).
- Set the blending mode to Soft Light or Overlay and adjust the opacity to control the effect.
- Use a black mask and paint with a white brush to apply the effect selectively to the skin areas.
This method provides control over the degree of smoothing, ensuring that the skin looks natural and unprocessed.
Advanced Healing Brush and Clone Stamp Techniques
The Healing Brush and Clone Stamp tools are indispensable for skin retouching. Advanced use of these tools involves blending skin tones and textures seamlessly to remove imperfections.
Healing Brush Tool
- Choose the Healing Brush tool from the toolbar.
- Set the brush hardness to 0% for softer edges.
- Alt-click (Option-click on a Mac) to sample an area near the blemish.
- Carefully paint over the imperfection, blending it with surrounding skin.
Clone Stamp Tool
- Choose the Clone Stamp tool from the toolbar.
- Set the brush hardness and opacity according to the area you’re working on (lower hardness for smoother blending).
- Alt-click (Option-click on a Mac) to sample clean skin near the area you want to fix.
- Gently paint over the imperfection, ensuring that the texture matches the surrounding skin.
Combining these tools allows for precise and clean retouching, targeting specific imperfections without affecting the overall texture.
Using the Mixer Brush for Seamless Skin
The Mixer Brush tool in Photoshop is another powerful feature for skin retouching. This tool blends colors smoothly, mimicking traditional painting techniques and providing a refined finish.
- Select the Mixer Brush tool from the toolbar.
- Choose a soft brush with low wetness (10-20%) to prevent over-blending.
- Sample clean skin areas and brush over blemishes, blending them into the surrounding skin.
- Adjust the brush settings as needed to achieve the desired effect.
- Use a separate layer for Mixer Brush operations to maintain non-destructive editing.
This technique is particularly effective for blending harsh lines or color transitions, creating a uniform skin appearance.
Conclusion
Mastering advanced skin retouching techniques in Photoshop involves a blend of artistic vision and technical skills. Methods such as Dodge and Burn, Frequency Separation, Inverted High Pass, and the proficient use of the Healing Brush, Clone Stamp, and Mixer Brush tools, provide the flexibility and precision needed for professional-quality results. By integrating these techniques, photographers and retouchers can create stunning, natural-looking portraits that showcase the subject’s beauty without over-processing.
FAQs
1. What is the most important step in skin retouching?
The most crucial aspect of skin retouching is maintaining the natural texture of the skin while removing imperfections. Techniques like Frequency Separation and Dodge and Burn help achieve this balance effectively.
2. How can I avoid making the skin look plastic or over-processed?
To avoid a plastic or over-processed look, use subtle adjustments and lower opacity settings. Techniques like Dodge and Burn and using the Mixer Brush with low wetness settings can help preserve the natural appearance of the skin.
3. Can these techniques be used on all skin types?
Yes, these techniques can be applied to all skin types. However, it’s essential to adjust the settings and tools according to the specific characteristics of the skin you are working with, such as texture, tone, and individual blemishes.
4. How do I decide between using the Healing Brush and the Clone Stamp?
The Healing Brush is ideal for blending and matching textures seamlessly, while the Clone Stamp is better for areas where exact replication is needed. Use the Healing Brush for smaller imperfections and the Clone Stamp for more significant corrections.
5. What is the purpose of using separate layers for retouching?
Using separate layers for retouching allows for non-destructive editing. It provides the flexibility to make adjustments and revert changes without compromising the original image, ensuring a more precise and controlled editing process.


