Understanding Image Contrast
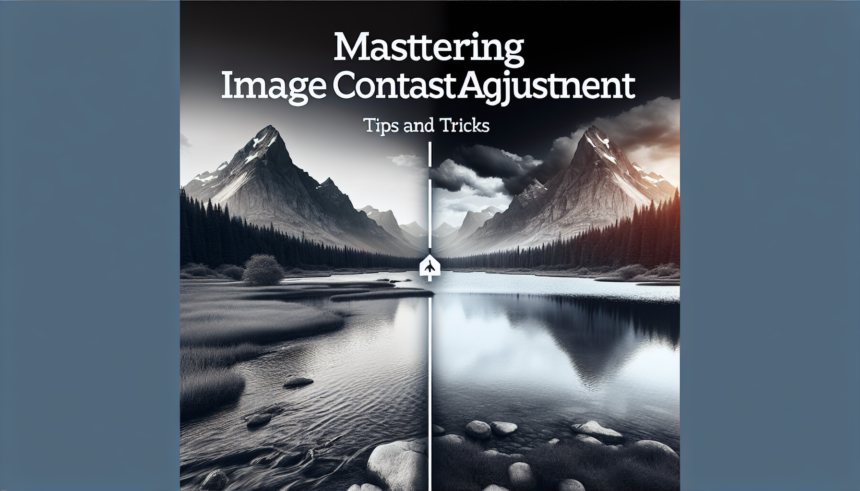
Image contrast is a crucial element in photography and graphic design, defining the difference in luminance or color that makes objects distinguishable. High contrast images prominently show distinctions between different elements, while low contrast images tend to be a bit more subdued. Mastering contrast adjustment can turn a good photo into a great one by enhancing details and giving the image depth and dimension.
Why Adjust Image Contrast?
There are several reasons to adjust image contrast:
- Highlight Details: Adjusting contrast can bring out details that may be lost in a more uniformly lit image.
- Control Mood: High contrast can make an image appear more dramatic, while lower contrast can create a softer, more subtle feel.
- Correct Exposure: Improper exposure levels can be corrected by tweaking contrast settings.
Tools for Adjusting Image Contrast
Various software tools can be used for contrast adjustment, ranging from simple mobile apps to professional-grade software like Adobe Photoshop and Lightroom. Here’s a quick overview of some popular options:
- Adobe Photoshop: Widely regarded as the industry standard, Photoshop offers robust tools for contrast adjustment.
- Lightroom: Known for its user-friendly interface, Lightroom is excellent for batch-processing and fine-tuning images.
- GIMP: An open-source alternative to Photoshop, GIMP offers a range of contrast-adjustment tools for free.
- Mobile Apps: Apps like Snapseed and VSCO are great for quick, on-the-go adjustments.
Steps to Adjust Image Contrast
Adjusting image contrast may vary slightly depending on the software you use, but here are the basic steps:
- Open the Image: Start by opening your image in the chosen software.
- Select the Contrast Tool: Most software has a designated tool or slider for contrast adjustments.
- Adjust the Contrast: Slowly move the contrast slider to increase or decrease the contrast until you achieve the desired effect.
- Save the Image: Save the adjusted image in your preferred format.
Tips for Effective Contrast Adjustment
While the steps for adjusting contrast are straightforward, there are some tips and tricks to ensure that your adjustments enhance rather than detract from your image:
- Start with a Good Base Image: Ensure your image is well-lit and properly exposed before making any adjustments. This provides a solid foundation for further enhancement.
- Use Layer Masks: In programs like Photoshop, use layer masks to apply contrast adjustments selectively. This prevents over-contrasting parts of the image that don’t need it.
- Check Histogram: Use the histogram to monitor the tonal range of your image and ensure you’re not clipping highlights or shadows.
- Subtle Adjustments: Less is often more when it comes to contrast. A common mistake is over-adjusting, which can result in unnatural-looking images.
- Experiment with Local Adjustments: Use tools like the brush or gradient tools to apply contrast adjustments to specific areas of your image.
Handling Problems with Contrast
Sometimes, adjusting contrast can introduce certain problems such as noise or halo effects around edges. Here are some solutions:
- Noise Reduction: High contrast can sometimes amplify noise in an image. Consider using noise reduction tools to mitigate this issue.
- Combatting Halos: Overly aggressive contrast adjustments can create halo effects along edges. Use feathering or blend modes like “Soft Light” to reduce halos.
- Preserving Details: Be cautious not to lose detail in shadow or highlight areas. Use the “Shadows” and “Highlights” adjustment sliders to preserve detail.
Using Contrast Creatively
Beyond the technical applications, contrast can be a tool for creativity. Here are some ideas:
- Black and White Photography: High contrast can make black and white photos more striking, emphasizing shapes and patterns.
- Silhouettes: Use contrast to create stunning silhouette images by underexposing the subject against a bright background.
- Artistic Filters: Apply artistic filters in conjunction with contrast adjustments for unique visual effects.
Integration with Other Adjustments
Contrast adjustment works best when integrated with other image adjustments like brightness, saturation, and sharpness. Here’s how to coordinate them effectively:
- Brightness: Adjust brightness first before contrast. Changes in brightness can affect the perceived contrast of an image.
- Saturation: Increasing contrast can sometimes oversaturate colors. Be ready to dial back saturation if necessary.
- Sharpness: Increase sharpness after adjusting contrast to ensure fine details are crisp and clear.
Conclusion
Mastering image contrast adjustment takes practice but can significantly enhance your images, adding depth, mood, and clarity. Whether you’re a seasoned photographer or a beginner, understanding the principles and tools of contrast adjustment is essential for creating visually stunning images. Remember to start with a good base image, make subtle and thoughtful adjustments, and integrate contrast changes with other modifications for the best results. Happy editing!
FAQs
- Q1: What is contrast in an image?
A1: Contrast in an image refers to the difference in luminance or color that makes objects distinguishable. High contrast images show a stark difference between light and dark, while low contrast images are more subdued. - Q2: What tools can I use to adjust image contrast?
A2: Tools for adjusting image contrast include software like Adobe Photoshop, Lightroom, GIMP, and mobile apps like Snapseed and VSCO. - Q3: How can I avoid making my image look unnatural when adjusting contrast?
A3: To avoid an unnatural look, make subtle adjustments, use layer masks for selective changes, and monitor the histogram to ensure you’re not clipping highlights or shadows. - Q4: What should I do if adjusting contrast introduces noise?
A4: If contrast adjustment introduces noise, consider using noise reduction tools. Programs like Lightroom and Photoshop offer advanced noise reduction settings. - Q5: How can contrast adjustments be used creatively?
A5: Contrast adjustments can be used creatively in black and white photography, to create silhouettes, and in combination with artistic filters for unique effects.


